Artificial intelligence is changing our world at a pace unmatched by anything we have experienced before. The global AI market is expected to grow to $190.61 billion by 2024, and the compound annual growth rate for the period from 2024 to 2030 will be 36.2%. Developers and data scientists looking to reap its potential, therefore, need to get their hands around the right tools.
Yet, the market of AI development tools is huge and confusing at the same time. Many professionals drown in this vast ocean, losing a great deal of time and resources on tools that don’t quite fit their needs.
This comprehensive guide intends to take an in-depth look at four of the industry-leading AI platforms: Amazon SageMaker, Microsoft Copilot Studio, Google Vertex AI, and Azure AI Studio.
These leading platforms work together to make AI development more accessible, allowing professionals like you to build, train, and deploy models with ease.
Similar tools for coding: 15 Best Free AI Tools For Coding in 2024
1. Amazon SageMaker

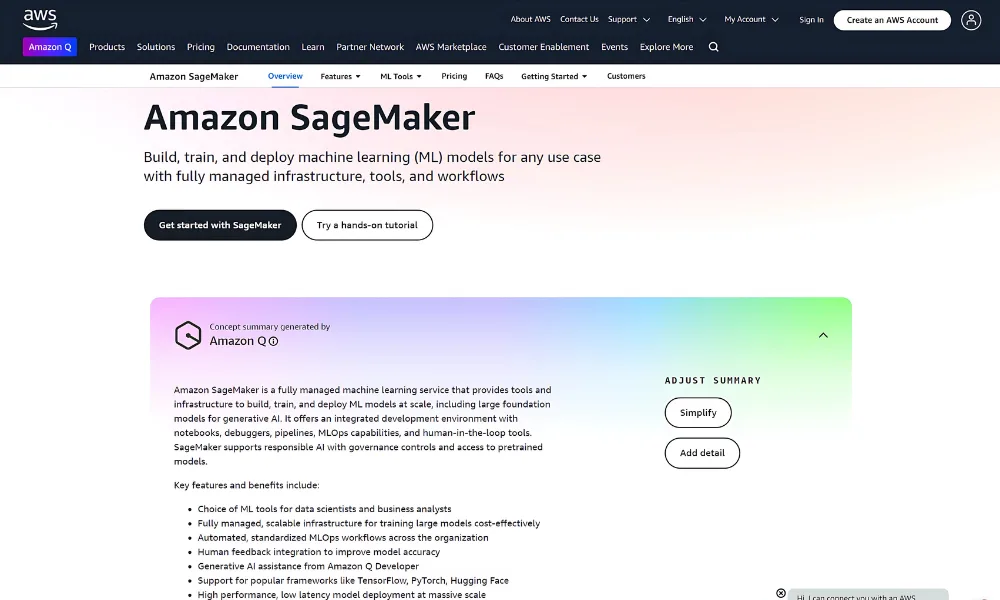
Amazon SageMaker is a fully managed service introduced by Amazon Web Services (AWS) in November 2017. Its purpose is to make it easier for developers and data scientists to build, train, and deploy machine learning (ML) models at scale.
Before SageMaker, creating and deploying ML models required significant expertise and manual effort in setting up infrastructure, managing data, and optimizing models.
Create a New SageMaker Project:
- Access SageMaker Studio: Once logged in, from the AWS Management Console, search for SageMaker in the search bar and click on SageMaker Studio.
- Set Up SageMaker Studio: If it’s your first time using SageMaker Studio, you’ll need to create a SageMaker Domain by selecting a user profile, instance type, and permissions. After the setup, click on Launch Studio to open the SageMaker Studio interface.
Create a New Notebook:
- Start a Notebook: In the SageMaker Studio dashboard, click on File > New > Notebook. Choose the environment (like a Python 3 kernel) for the notebook.
- Configure Notebook Settings: Specify instance type, networking, and storage if needed.
- Initialize the Notebook: Click Create Notebook to start a new SageMaker notebook where you can write and execute machine learning code.
Train a Model:
- Import Data: Use Amazon S3 to store and access the dataset you want to use for training.
- Select an Algorithm: You can either use a built-in algorithm or import your own custom algorithm.
- Start Training: Define the training job by specifying the algorithm, dataset, instance type, and hyperparameters. Run the training job directly from your notebook.
For those looking to dive deeper into Amazon SageMaker, here are some helpful resources to get you started:
- Amazon SageMaker Console
- Amazon SageMaker Studio Overview
- Creating a SageMaker Domain (First-time setup for SageMaker Studio)
- Getting Started with Amazon SageMaker Notebooks
- Training a Model in SageMaker
2. Microsoft Copilot Studio

Microsoft Copilot Studio simplifies AI project development with ready-to-use templates and built-in AI insights. It helps users quickly configure, train, and deploy machine learning models for tasks like team collaboration, voice features, and data-driven decision-making. The platform is versatile, supporting industries from retail to sustainability.
Step-by-Step Guide for Microsoft Copilot Studio
To get started with Microsoft Copilot Studio, navigate to the Studio and log in with your Microsoft account credentials. Whether you’re working within a company or organization, this platform helps you streamline project creation using AI-driven templates.
1. Create a New Project
From the home screen, click on the Create button located on the left sidebar. Microsoft Copilot Studio offers a variety of templates, each tailored to different project needs. For instance:
- Voice is ideal for projects requiring Natural Language Understanding (NLU) and voice capabilities.
- Team Navigator enhances team collaboration and task management through AI insights.
- Store Operations optimizes retail operations and inventory management.
- Sustainability Insights helps track and analyze environmental data to support sustainability efforts.
- Safe Travels assists with travel safety and logistics.
- Weather offers weather-related predictions, perfect for agriculture and logistics industries.
After selecting the template that fits your needs, you’ll be prompted to define essential project details like name, icon, and language. These configurations will help you organize and manage the project effectively.
2. Configure Data Sources
Once your project is initialized, you may need to connect relevant data sources. This could involve linking databases, external APIs, or sample datasets provided by the template. The data you use here is crucial for training and testing your model later in the process.
3. Train and Test the Model
If your chosen template involves machine learning models, such as Voice or Team Navigator, you will need to train the model using your data. Use the inbuilt testing environments to ensure the model performs as expected and adjust configurations as needed to optimize results.
4. Deploy the Project
Once your model has been trained and tested, navigate to the Deploy section. Configure final settings such as compute resources and user access, then deploy your project to a live environment.
You’ll receive a URL endpoint or integration instructions to use the project within your desired application.
Additional Resources
For further assistance and in-depth guides, you can check out these Microsoft Copilot Studio resources:
3. Google Vertex AI

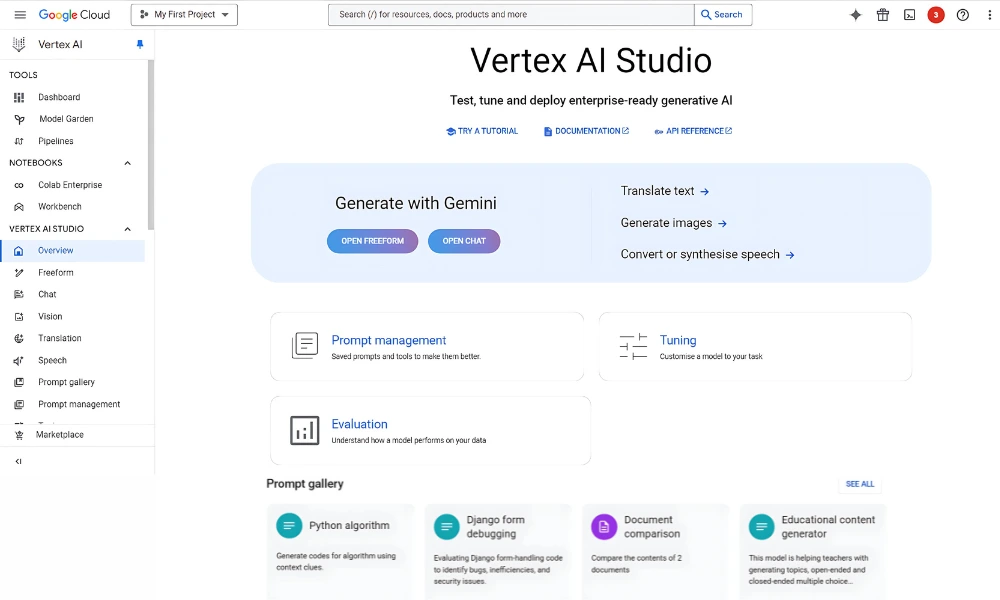
Google Vertex AI is a comprehensive machine learning platform that enables developers and data scientists to build, deploy, and scale AI models efficiently. By providing a unified interface, it simplifies end-to-end machine learning workflows, allowing teams to focus on innovation.
Additionally, its powerful integration of tools for data preparation, model training, and deployment enhances collaboration and accelerates the development of sophisticated AI applications.
Step-by-Step Guide for Google Vertex AI
- Access Google Cloud Console: Open your browser and navigate to the Google Cloud Console. Log in using your Google Cloud account credentials.
- Enable Vertex AI API: If using Vertex AI for the first time, go to the API & Services dashboard and enable the Vertex AI API for your project.
- Create a New Project: In the Google Cloud Console, click the Project Selector. Create a new project by providing a name, organization (if applicable), and a billing account. Click Create.
- Access Vertex AI: In the left-hand menu, click on AI & Machine Learning, and select Vertex AI from the dropdown.
- Create a New Vertex AI Model:
- Click “Create New” to start building a model.
- Choose AutoML if you prefer automated training and optimization, or Custom Training if you want to use your own models or datasets.
- Import Your Data: Go to the Dataset section in Vertex AI, click Create Dataset, and select the data type (e.g., Tabular, Image, Text, Video). Upload from your local machine or Google Cloud Storage.
- Train Your Model: After uploading data, click Train New Model. Configure the target (your prediction goal), select training options, and begin the training process.
- Deploy Your Model: Once training is complete, go to the Models section and click Deploy. Specify compute resources like instance type and region for serving the model.
- Make Predictions: Test the deployed model with real-time predictions in the Prediction tab or integrate it via the REST API endpoint into your application.
Additional Resources for Google Vertex AI:
- Google Vertex AI Documentation
- Google Cloud Console (Vertex AI)
- Getting Started with AutoML
- Custom Model Training
4. Azure AI Studio

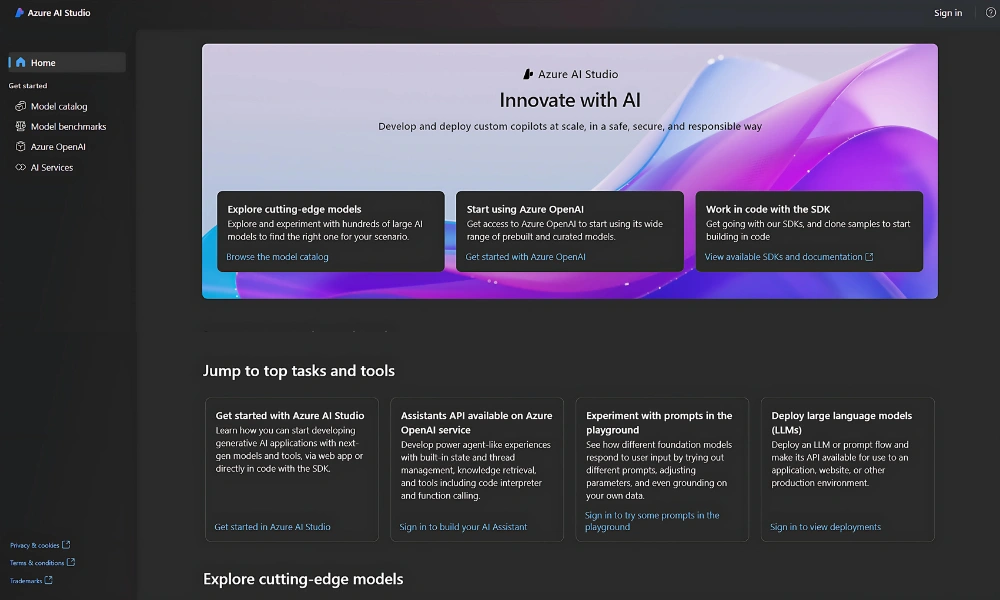
Azure AI Studio is a platform designed to streamline the development and deployment of artificial intelligence applications. It provides tools for building custom AI models and integrating capabilities like Natural Language Processing and image recognition into projects.
Additionally, its user-friendly interfaces and seamless integration with Microsoft Azure’s cloud services enable developers to effectively leverage AI, turning innovative ideas into practical solutions.
Step-by-Step Guide for Azure AI Studio
- Access Azure AI Studio
Open your browser and navigate to the Azure AI Studio. Log in using your Azure account credentials. If you don’t have an account, you can easily sign up for a free version. - Create a New AI Service
- Once logged in, click on Create a resource from the Azure Portal dashboard.
- In the search bar, enter AI + Machine Learning and select Azure AI from the results.
- Click the Create button to begin configuring your new AI resource.
- Select the AI Service Type
Azure AI Studio provides a variety of services, including:- Language Understanding (LUIS) for Natural Language Processing (NLP) and text analysis.
- Form Recognizer for extracting structured data from documents.
- Text Analytics for sentiment analysis and entity recognition.
- Speech Services for speech-to-text and text-to-speech capabilities.
- Translator for language translation.
- Define Project Details
- Provide essential project details such as a name, resource group, and region.
- Select a pricing tier that suits your project needs.
- Click on Review + Create to finalize and deploy the AI resource.
- Connect Data Sources
After deploying the AI service, you can upload or link your data for training and testing the model. For instance, in Form Recognizer, you can upload PDFs or images to extract structured data for further analysis. - Test and Deploy
- Once your data sources are configured, test the AI model using the Test environment within Azure AI Studio.
- When satisfied with the results, click on Deploy to specify the necessary compute resources for deployment.
Azure Machine Learning Studio – Step-by-Step Guide
- Access Azure Machine Learning Studio
Open your browser and navigate to Azure Machine Learning Studio. Log in using your Azure account credentials, or create a free account if needed. - Create a New Machine Learning Workspace
- On the Azure ML Studio dashboard, click on Create a new workspace.
- Fill in the required details, including workspace name, subscription, resource group, and region.
- Click Create to initialize your workspace.
- Upload a Dataset
- After creating the workspace, navigate to the Datasets section on the left sidebar.
- Click Create dataset and choose whether to upload from a local file, cloud storage (like Azure Blob Storage), or other sources.
- Define dataset details such as name, description, and data type, then complete the upload.
- Train a Model
- Once your dataset is uploaded, go to the Designer tab in the sidebar.
- Drag and drop your dataset onto the workspace and select a pre-built algorithm or upload your own custom model.
- Connect the dataset to the chosen algorithm, define the necessary parameters, and initiate the training process.
- Evaluate and Deploy the Model
- After training, evaluate the model’s performance using the Evaluate widget in the designer.
- If the results meet your expectations, navigate to the Endpoints section and click Deploy.
- Select the deployment type (real-time or batch), configure the required compute resources, and click Deploy to obtain an endpoint for your model.
Overview of Azure Cognitive Services
Azure Cognitive Services is a robust suite of artificial intelligence (AI) services and APIs that empower developers to seamlessly integrate powerful AI capabilities into their applications. This integration can be achieved without requiring extensive expertise in machine learning, making AI accessible to a broader audience.
Wrapping Up
AI development platforms have the power to change and reshape how we solve problems in many industries. These tools don’t just expand what machine learning can do; they also spark new ideas across many fields.
But to do well in this area, you need to pick the right platform for your needs and keep getting better as the tech changes.
The heart of AI isn’t just having these tools; it’s about using them to solve real problems that matter. So, think of these platforms as key helpers on your AI path letting you create smart solutions that make a difference.


No Comment! Be the first one.